
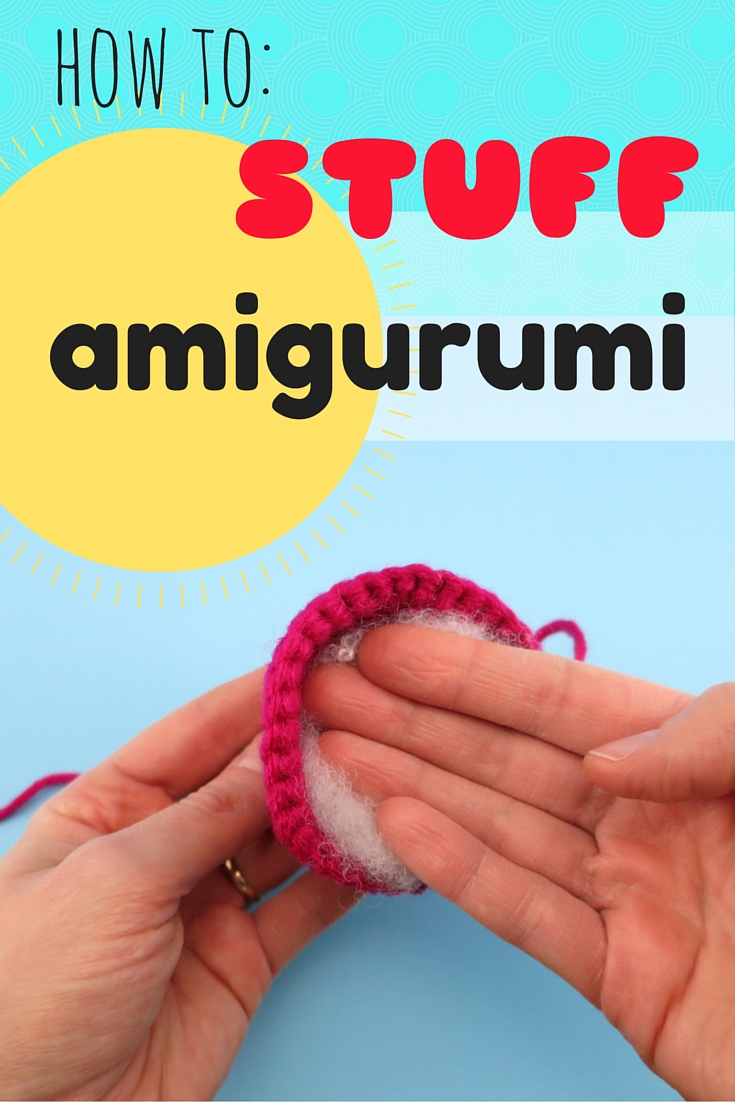
One question that often comes up when making amigurumi, but is never explained within in an actual pattern, except for a “start stuffing” in passing, is how to stuff your creation. It seems simple in concept, stuff the stuffing in, but there are so many things that can go wrong! Sometimes you end up with a lumpy bumpy animal, or one that looks like it has deflated. Or maybe you stuffed your creature so much there is literally stuffing popping out at the seams. I am not a stuffing expert and I am still learning with each new ami I make, but I am going to share with you my current technique for stuffing here, because right now it seems to be working!
First, the stuffing itself:
No matter what technique you use to stuff your amigurumi, the stuffing you use makes a huge difference. I tried a number of different brands before landing on the one I like best, and I suggest you do the same. If you are always frustrated during the stuffing process, it might be the stuffing, not you! Don’t settle when it comes to stuffing – try a variety until you are satisfied.
I mostly use polyester stuffing because it is convenient and the cost is right, but if you want a more natural material there are other options, such as cotton, corn, hemp, and wool.
There are basically two main methods of stuffing:
- Put as much stuffing as you can into the piece all at once in one big clump, then add more to the centre of the clump if needed. The key is to only add stuffing in the middle so the outside remains smooth and less lumpy.
- Put the stuffing in layer by layer, one on top of the other, until the ami is filled. The key for this method is to use fairly thin layers for smoothness and less lumpiness.
I have tried both methods, and by far my favourite is option 2. I have used the first method, and it does work pretty well when your ami is one big ball themselves, with no shaping (such as for my Koko the Owl pattern), but doesn’t work so well for other designs (such as Hanna the Squirrel).
My technique:
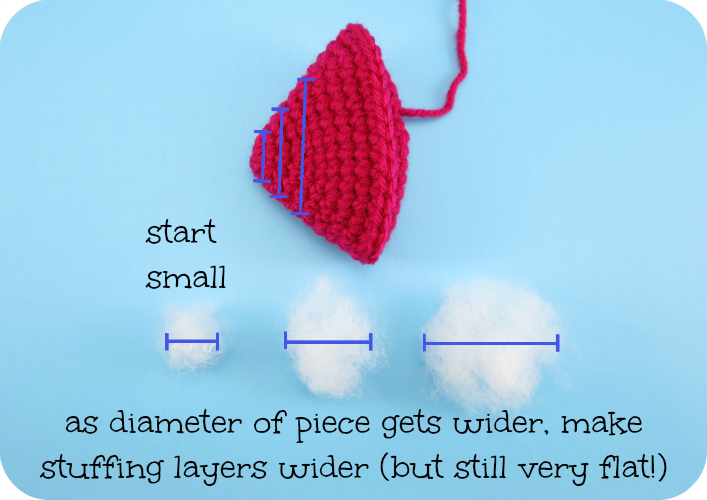
I stuff my amigurumi using thin layers of polyester stuffing layered on top of each other. Each layer is the same size in diameter as the area I am stuffing. For example, if I was stuffing a pointed piece, my layers of stuffing would start off very small in circumference, and then gradually increase in size as I work my way up the widening piece.
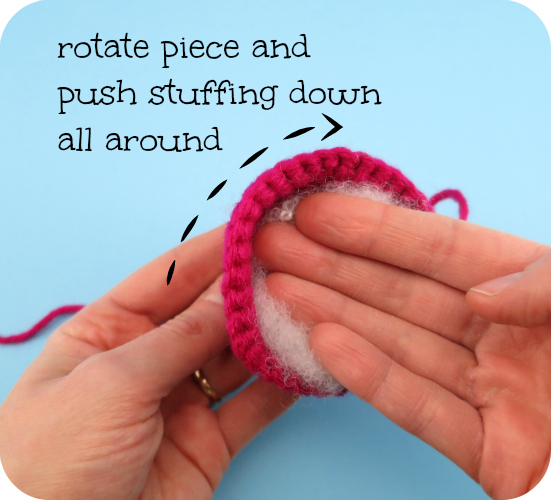
After each layer I place, I push it down into the piece, pressing on the entire surface area of the layer, but mostly at the edges. I push the back of my fingers (or hand, depending on the size of the piece) down on the layer, with my finger tips at the edge of the piece, and turn the piece as I do this (lifting the hand up and down as I turn), pushing the stuffing down all the way around. I do this for EVERY layer I place.
Yes, this process is long and a little tedious, but honestly, it is less frustrating than trying to stuff an amigurumi that always comes out lumpy. By pressing down each layer before adding more, I also get a nice dense filling that is less likely to deflate later. The ami does look a little funny during the whole process, a little bulbous where I have stuffed, but in the end, when it is complete and closed up, it works great!
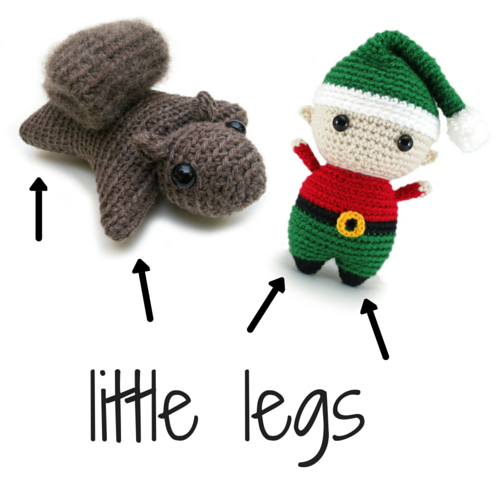
If your amigurumi has little limbs that are part of the main body, such as the legs of my Felix the Elf pattern and Hanna the Squirrel, then stuff the limbs first really well, with many layers, using the method above before you start using large pieces of stuffing for the main body. If you jump to the larger sized layers for the body too soon, the legs won’t be stuffed enough compared to the body.
When have you added enough stuffing? Knowing this comes with practice. It depends on your stuffing, your technique, and what you prefer for your finished amigurumi. I like to stuff my amigurumi a lot initially because the stuffing tends to become less dense with time. Even right before closing the last stitch of a piece, I am sticking in more stuffing with a stuffing tool (ie. chopstick) so that it is filled up right to the end, in all corners.
So that is how I like to stuff my amigurumi. What about you? Do you have a special technique that works? Would love to hear about it!


9 responses to “How to stuff amigurumi”
Great sharee
I got tired of always looking for small containers to hold items to make rattles. So today I was surfing Amazon and decided to look at mini plastic easter eggs. I found 1 7/8 ” eggs. $6 for 144 pieces.
I had bells and the sound was muffled.
Well it worked. The eggs have a small hole on each end. So I used 1/2 an egg, threading the yarn down into the hole thru the bell and then back thru the hole in the egg drawing it tight. I then placed the 1/2 egg and bell in the body of my octipus head and secured it with the last few stitches . The bell is secure and the sound is not muffled.
The eggs I bought are hinged so I will fill some with small beads or beans and then a small piece of tape to hold it shut.
My next discovery is using squeekers , I’ve tried several different ways to secure these . Placing them in a foot or hard of you toy. And a few stitches to hold ithe in place. If your piece doesn’the have a foot or hand I crochet a small pouch as slip the squeeker in it and secure it with a few stitches to the inside of the piece. Another item I have used to hold the rattle filler are 2 small caps from a milk carton or water bottle. Insert beans or beads and tape of glue the caps together. .
Any suggestions as to stuffing animals that have such heavy heads the neck doesn’t hold it up. I made the unicorn and made a the maine with curling chains. I didn’t put all I had seen in another pattern as it was nice and full. But the poor head flops around. I’m so sad to have done all this work and not sure how to fix without destroying all the work.
Hi Janis! Sorry you are having troubles with your amigurumi making. I am not sure what pattern you are using, so don’t know how the head is attached to the body, but it sounds like the head may be attached to the body at a very narrow point with few stitches? For my patterns, I like to prevent “floppy head” by attaching the head using more stitches to the body, so a wider base and not such a narrow neck. If you have a small attachment point of the head to the body, and the head is heavy, even if you stuff the body and head a lot, you will still get floppyness. Maybe try securing the head more to the body with some extra stitches, to support it more?
[…] Megan from “hookabee” has a helpful tutorial about stuffing your Amigurumi. She shares her techniques here: How to stuff amigurumi […]
Good tips! I am an inconsistent stuffer. I never use any real technique because I always have to fiddle with my stuffing to get it right. I found a brand I really liked and threw away the bag and forgot the name, silly me. Now I’m using generic poly stuffing and I don’t like it but I have to use the bag before I’ll buy more. Hopefully I can find the one I like best next time. I believe it was a cotton/poly blend and if I remember correctly I had no lumpy issues.
Yes, I agree, sometimes the technique you use can depend on the piece you are stuffing and experimentation is needed. Cotton/poly blend?! That sounds fantastic. Never seen that before, but would love to try it. Hopefully you find it again!
Great advice. I’m going to try the layer technique.
Thank you! Yeah, give it a try. It is always worth experimenting and trying a new method!